Who doesn’t love a little sparkle in their life? 💎 If you’re looking to add a touch of glam to your nails without going overboard, simple rhinestone nail designs are your answer. These designs are perfect for any occasion—be it a casual coffee date, a glamorous party, or even your daily office look. The best part? You don’t need to be a pro to flaunt them!
From subtle accents to eye-catching patterns, rhinestone nails offer endless possibilities. Ready to explore some dazzling ideas that’ll make your nails the talk of the town? Keep reading and let your creativity shine through!
29Elegant & Simple Rhinestone Nail Designs
1. Matte Nail Designs With Rhinestones
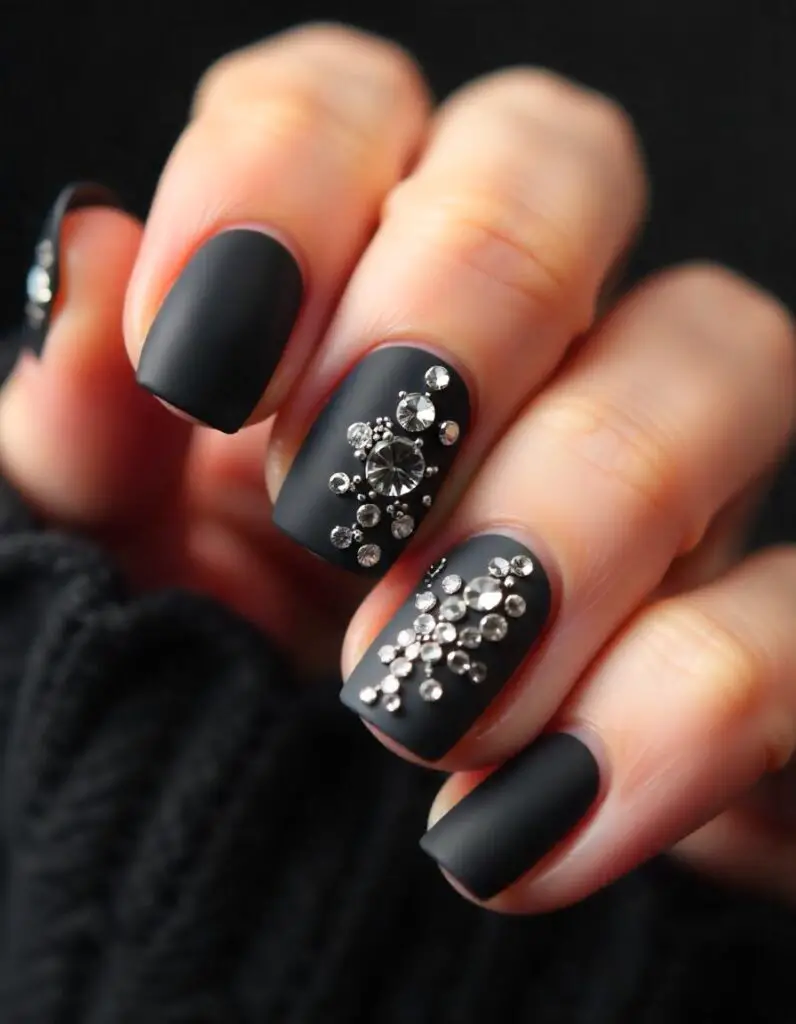

Matte nails with rhinestones are perfect for a chic and modern vibe. The matte finish adds elegance, while rhinestones give your nails a subtle sparkle. These designs work well with muted colors like black, grey, or pastel shades. Whether you want a minimal look with a few stones or an elaborate design, this style is versatile and classy.
How-To Steps:
- Apply a matte base coat in your favorite color.
- Let it dry completely to avoid smudging.
- Use nail glue to attach rhinestones where you want them.
- Secure the rhinestones with a clear top coat, focusing only on the areas with stones.
Perfect For:
- Formal events like weddings or galas.
- Office-friendly nail art.
- Casual outings when you want a hint of glamour.
2. Nails With Rhinestones on One Finger
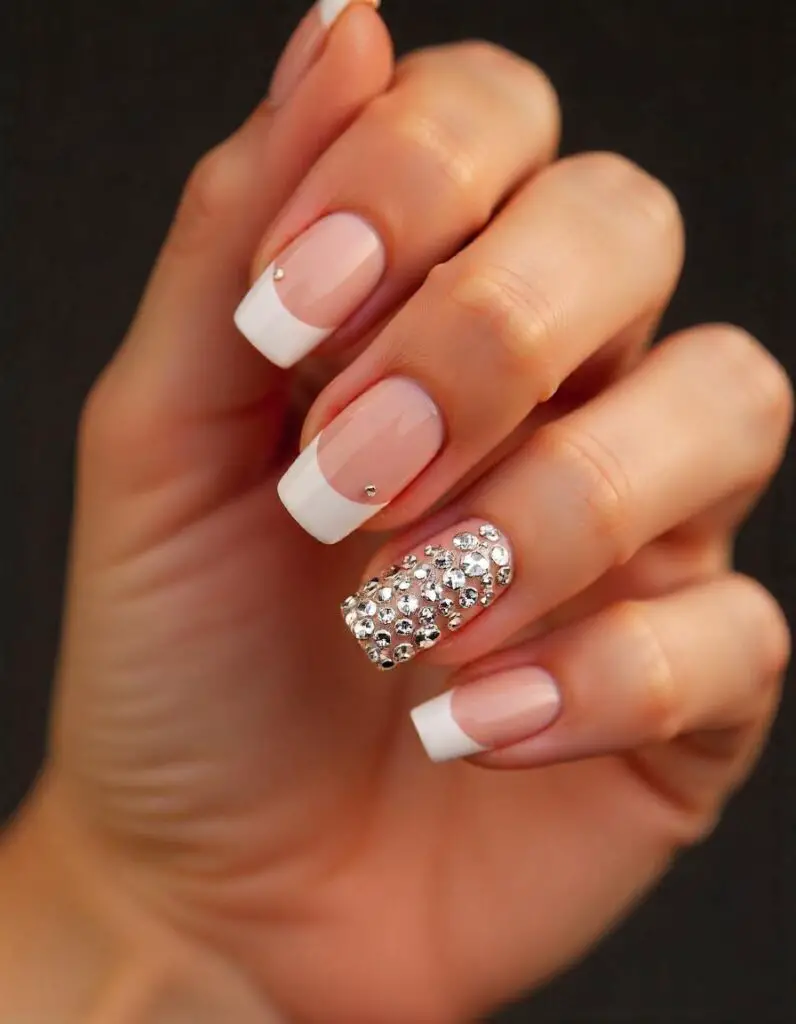

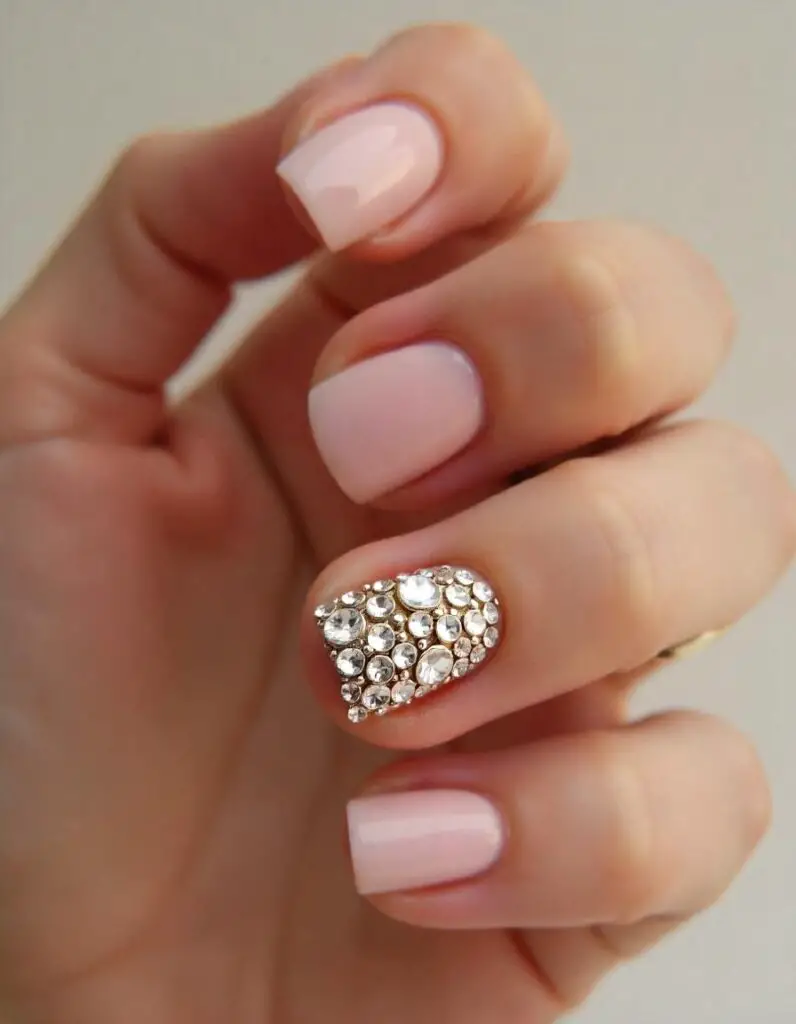

If you love simplicity with a twist, try adding rhinestones to just one finger! This style keeps the overall look clean and elegant while letting that one nail shine bright. It’s perfect for those who want a touch of glam without going overboard.
How-To Steps:
- Paint all your nails with a solid color of your choice.
- Select one finger on each hand (usually the ring finger).
- Apply rhinestones using nail glue in a simple or creative pattern.
- Finish with a clear top coat for durability.
Perfect For:
- Everyday wear with a stylish touch.
- Special dates or anniversaries.
- Minimalist nail art lovers.
You May Also Like: Top 25 Lavender Nail Designs You’ll Want to Try Right Now!
3. French Nail Art With Stones
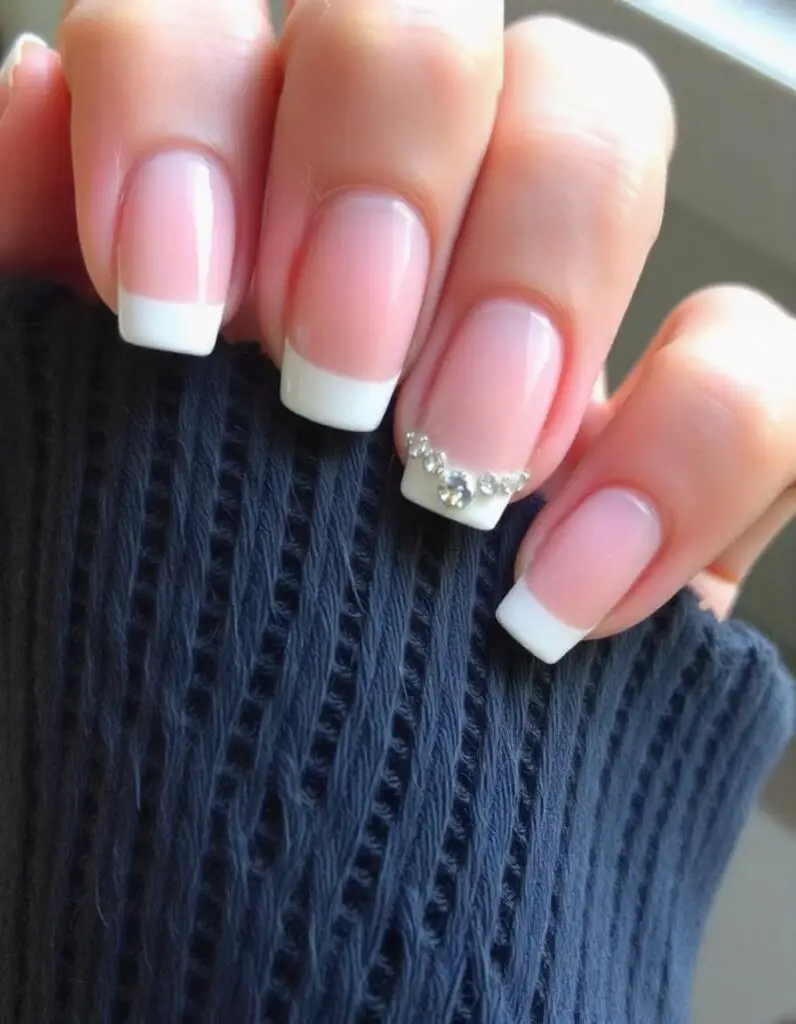

Classic French nails get a dazzling update with rhinestones! Whether you want to line the tips with tiny stones or add a single gem near the base, this design is timeless yet trendy. Perfect for enhancing a clean and polished look.
How-To Steps:
- Apply a neutral or clear base coat.
- Create white tips for the French manicure.
- Add rhinestones along the tip or near the cuticle using nail glue.
- Seal the design with a glossy top coat.
Perfect For:
- Bridal looks and engagements.
- Formal dinners or parties.
- Everyday elegance with a twist.
4. Pink Rhinestone Nails
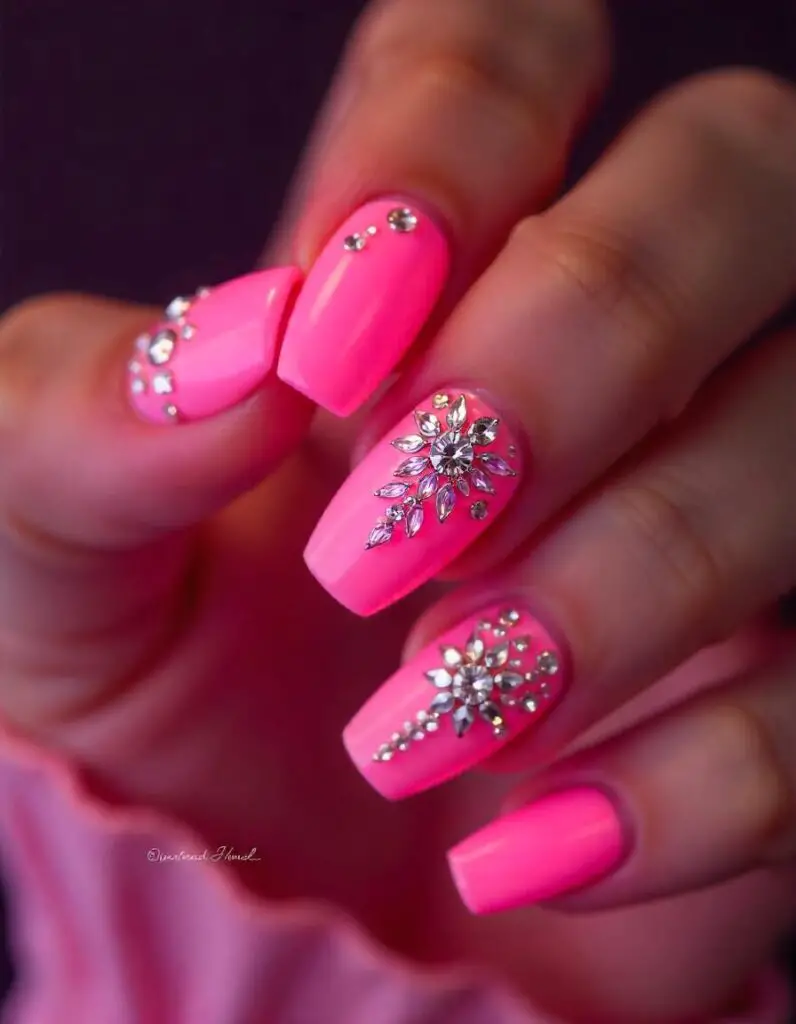

Pink nails with rhinestones are playful, feminine, and super versatile. Whether you choose baby pink for a soft look or hot pink for a bold statement, rhinestones add the perfect sparkle. This design works well with various shapes and patterns.
How-To Steps:
- Paint your nails with the pink shade of your choice.
- Decide on a rhinestone placement—center, edges, or a cluster.
- Attach the rhinestones using glue or a sticky base coat.
- Apply a final top coat to keep everything in place.
Perfect For:
- Girly parties and brunches.
- Romantic dates.
- Adding a pop of color to your style.
Recommended: 60 Must-See Aqua Blue Nail Designs for 2024!
5. Nude Nails With Rhinestones
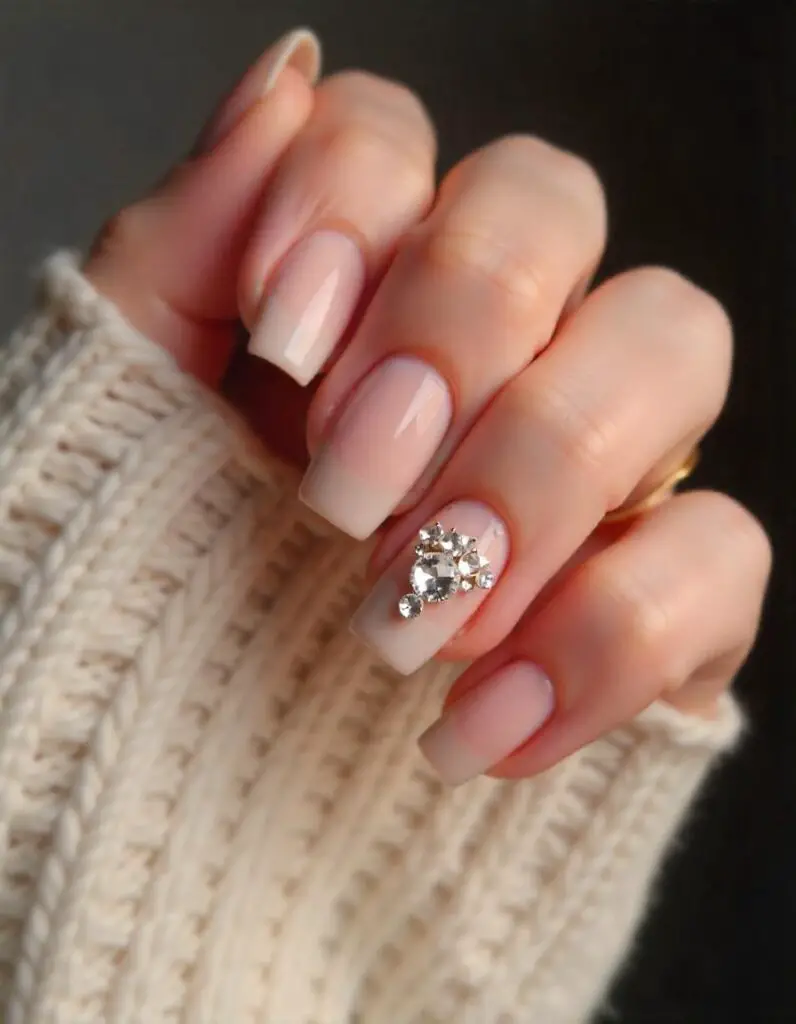

Nude nails with rhinestones are effortlessly classy and perfect for any occasion. The neutral tones keep the look subtle, while the rhinestones provide a touch of glamour. This design is ideal if you prefer understated elegance.
How-To Steps:
- Choose a nude polish that matches your skin tone.
- Apply two coats and let them dry.
- Add rhinestones to one or more nails in your desired pattern.
- Finish with a clear top coat for a long-lasting shine.
Perfect For:
- Professional settings or interviews.
- Day-to-night transitions.
- Timeless nail designs for all seasons.
Recommended: Purple Nail Designs 2025: Trendy Styles for Every Occasion
6. Stunning Red Nails with Rhinestones 💅✨
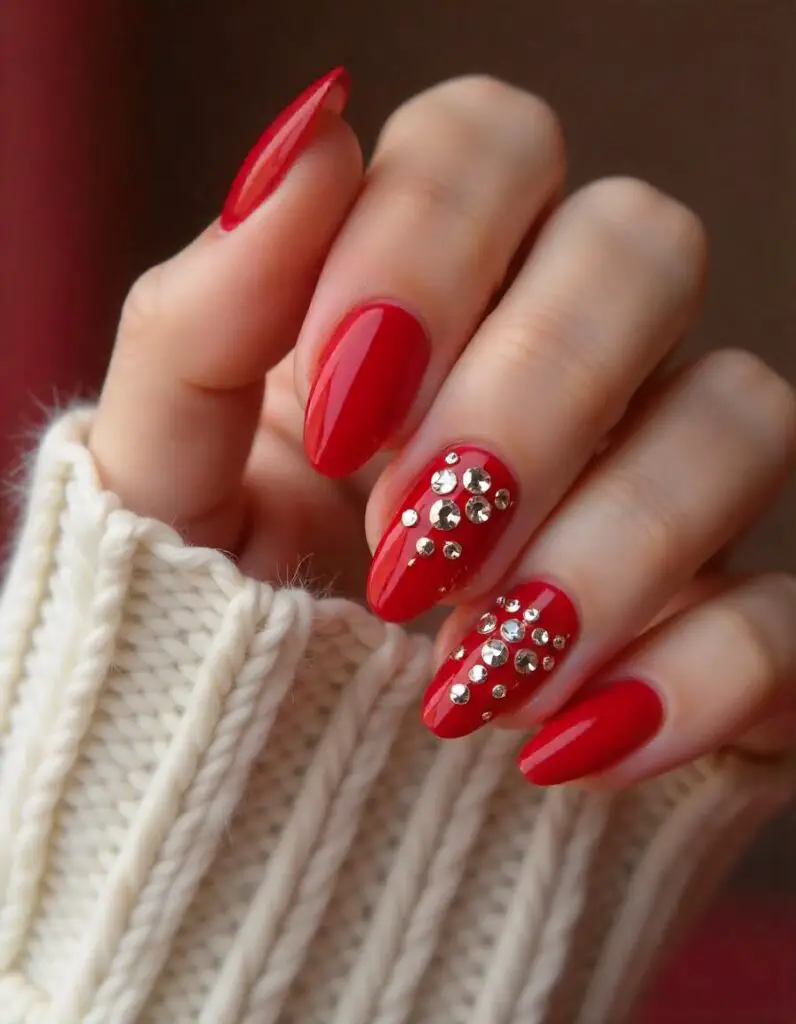

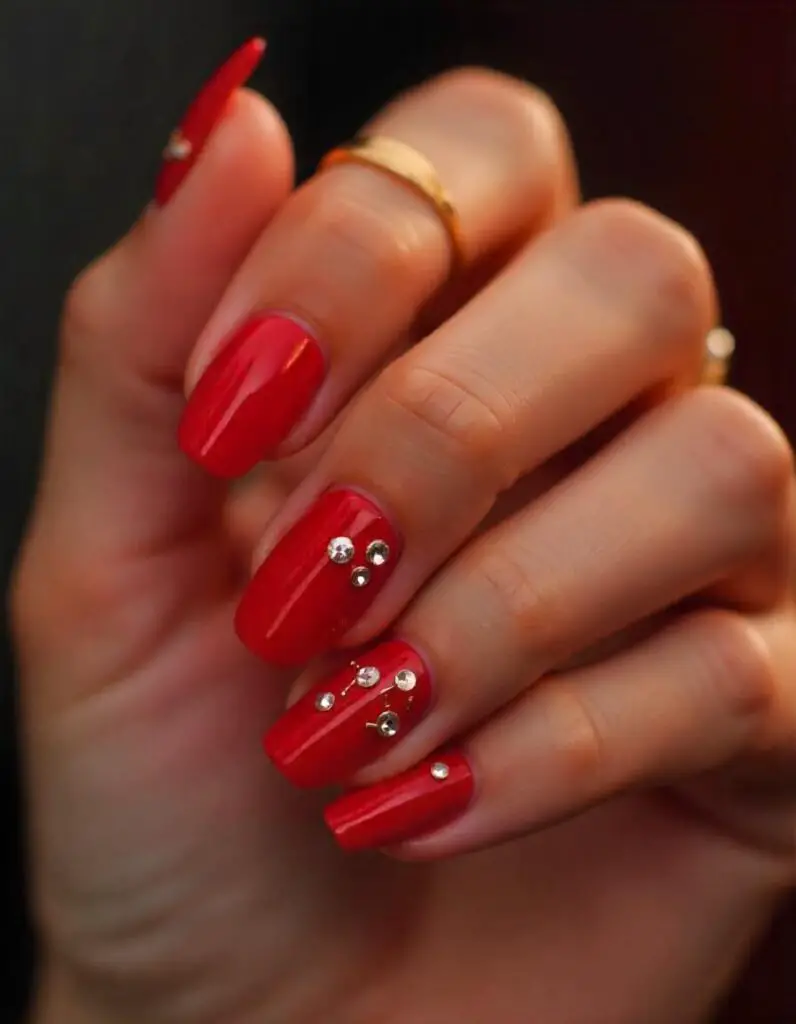

Red nails are a timeless classic, but adding rhinestones takes them to a whole new level of elegance and sparkle. Whether you’re heading to a romantic dinner or a festive party, this style screams sophistication and glamour. The contrast between the bold red polish and shimmering rhinestones makes your nails stand out effortlessly.
How-To Steps:
- Apply a base coat to protect your nails.
- Paint your nails with two coats of red polish.
- While the polish is slightly wet, place rhinestones using a picker tool.
- Secure them with nail glue or a clear top coat.
Perfect for:
- Valentine’s Day ❤️
- Weddings or engagements
- Festive celebrations like Christmas
7. Chic White Nails with Rhinestones 🤍✨
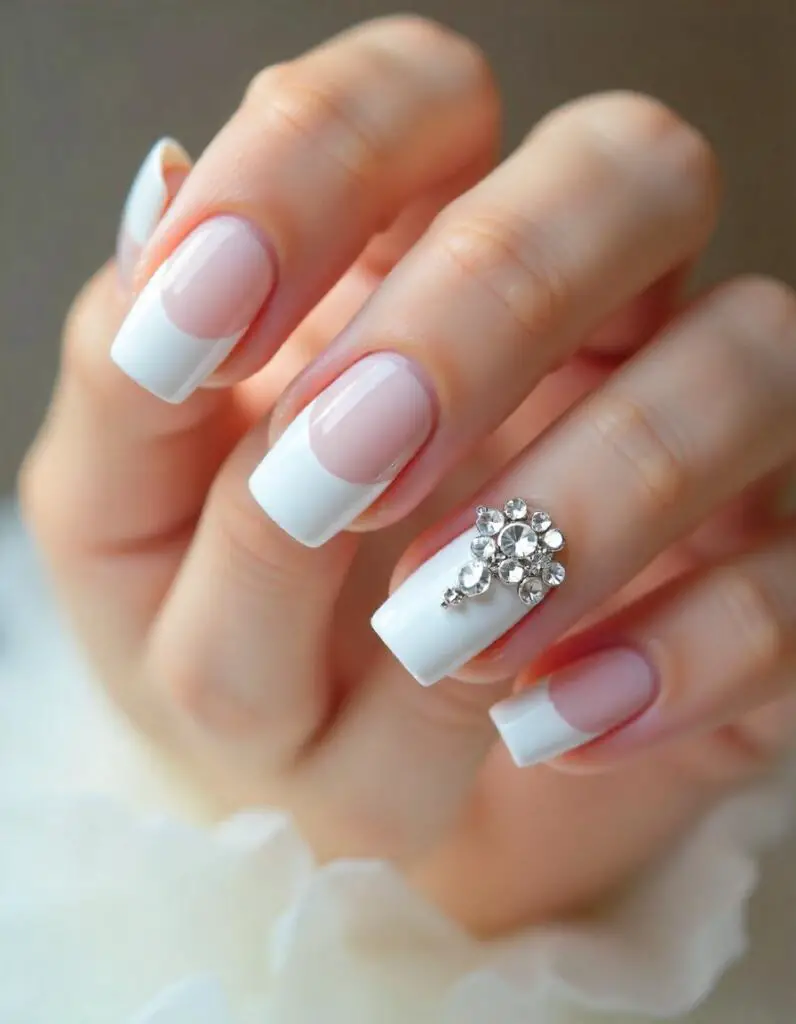

White nails are sleek and modern, and when paired with rhinestones, they become a symbol of elegance. This look is versatile, working beautifully for bridal events or as an everyday chic style. The simplicity of white polish highlights the sparkle of rhinestones, creating a clean and sophisticated vibe.
How-To Steps:
- Start with a clear base coat.
- Apply two coats of white nail polish and let it dry.
- Use a rhinestone picker to place stones in your desired pattern.
- Finish with a thick top coat to secure and shine.
Perfect for:
- Weddings and bridal showers
- Summer outings ☀️
- Minimalist fashion events
8. Elegant Rhinestone Lines for Fall Nails 🍁✨
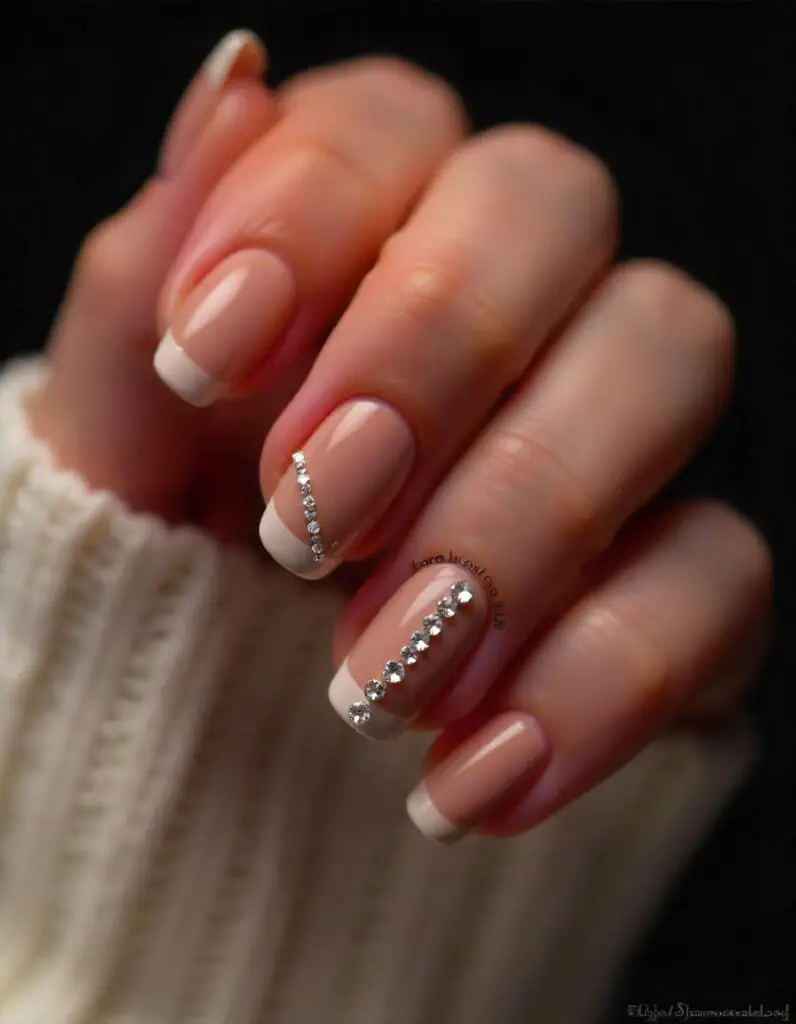

Looking for the perfect autumn-inspired look? Rhinestone-lined nails are subtle yet dazzling, capturing the warm hues of fall. This design uses rhinestones to create straight or wavy lines that add a touch of sparkle to earthy-toned nails. It’s simple, stylish, and totally seasonal!
How-To Steps:
- Choose a fall shade like brown, orange, or burgundy.
- Apply two coats of polish and let it dry.
- Arrange rhinestones in straight or curved lines using nail glue.
- Seal the design with a clear top coat.
Perfect for:
- Thanksgiving dinner 🦃
- Autumn-themed photoshoots
- Cozy coffee dates
9. Glamorous Long Nails with Rhinestones 💎✨
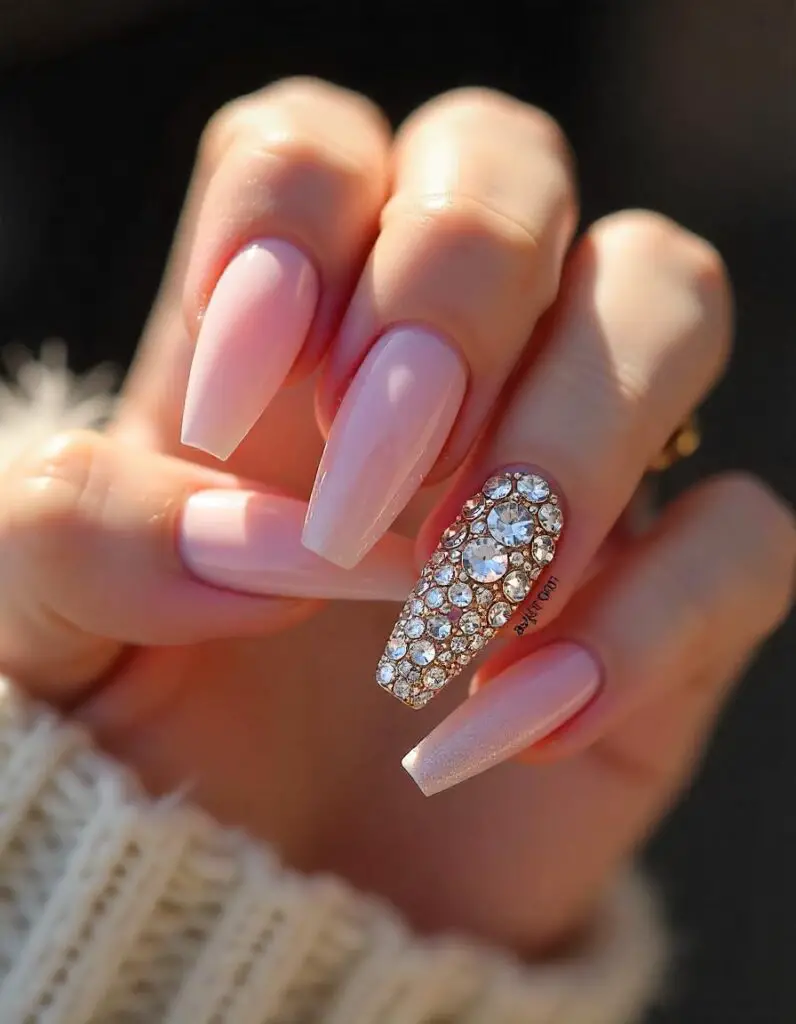

Long nails are a statement on their own, but adding rhinestones turns them into a true masterpiece. Whether it’s a full-on glitter extravaganza or subtle accents, this design works wonders for those who love dramatic and glamorous styles. It’s bold, beautiful, and perfect for making heads turn!
How-To Steps:
- File and shape your nails into your desired long shape.
- Apply your favorite nail polish as the base.
- Place rhinestones in a pattern—either all over or as accents.
- Secure them with nail glue and a shiny top coat.
Perfect for:
- Night parties or clubbing 🎉
- Fashion events
- Special celebrations like prom
10. Sparkling Rhinestone Lines for Seasonal Nails ✨🍂
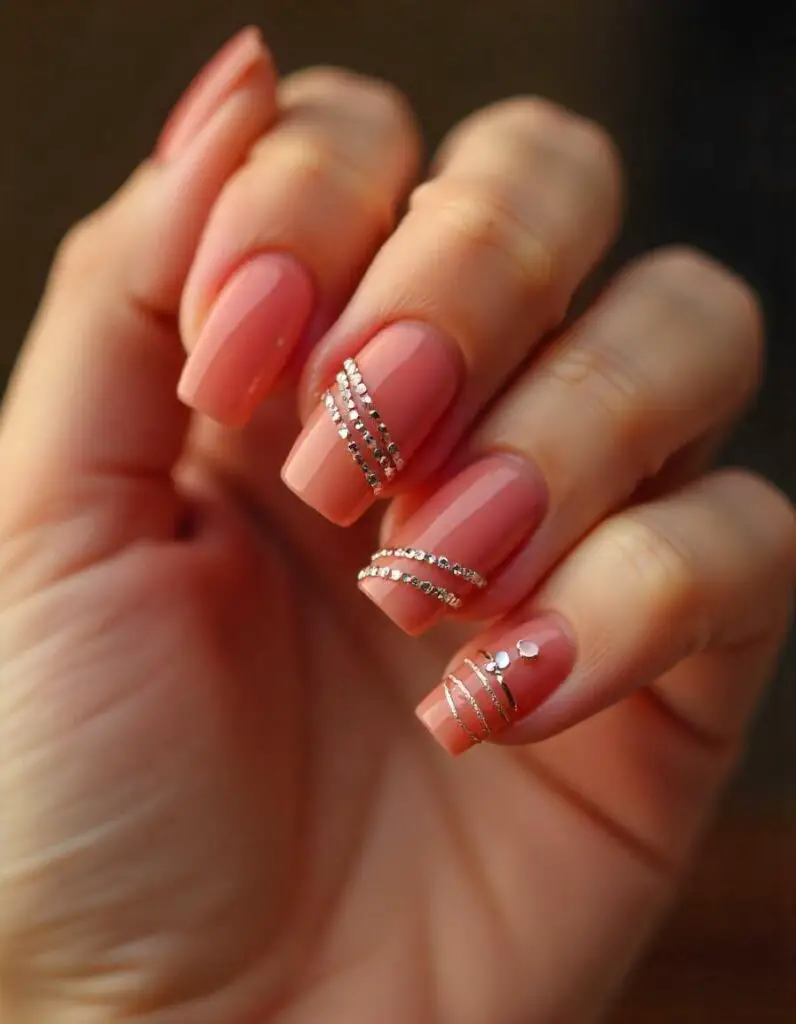

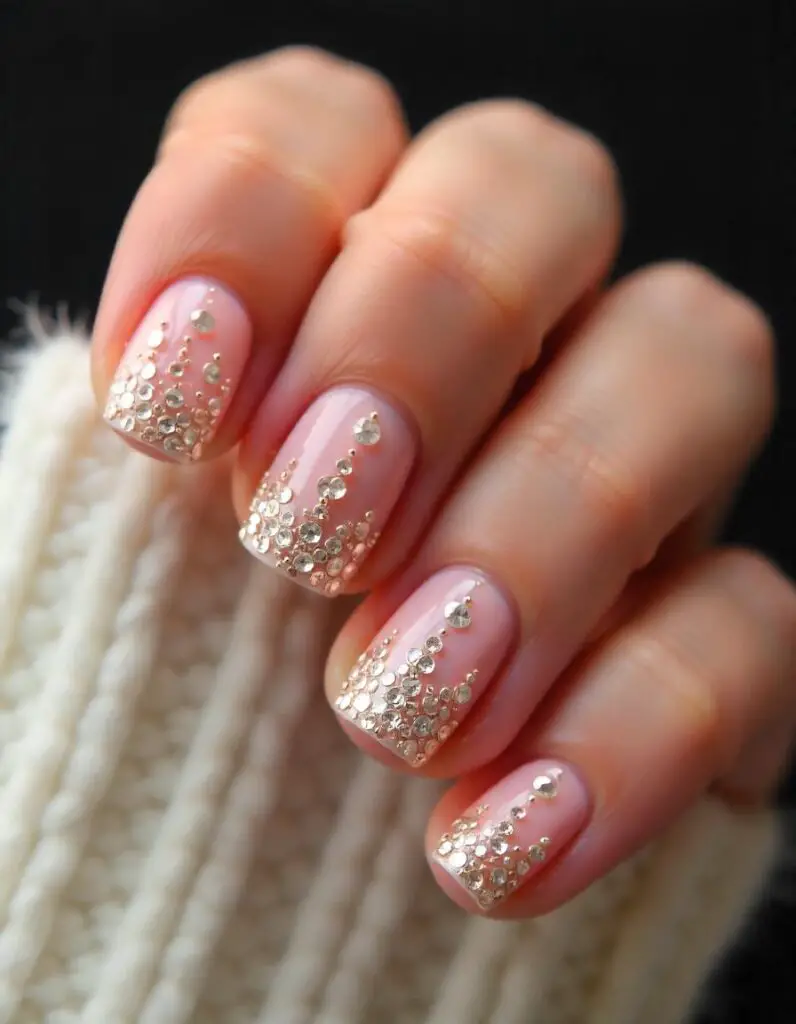

Add a touch of glamour to your seasonal nails with sparkling rhinestone lines. These designs are both trendy and easy to create, perfect for blending rhinestones into your everyday fall looks. Simple yet eye-catching, this style makes your nails look polished and put-together effortlessly.
How-To Steps:
- Pick a seasonal nail polish color (nude, burgundy, or orange).
- Apply two coats of polish and let it dry.
- Use rhinestones to form lines or stripes down your nails.
- Finish with a top coat to lock in the sparkle.
Perfect for:
- Fall festivals
- Casual hangouts
- Dinner dates during the autumn season
11. Short Nails Sparkling with Rhinestones
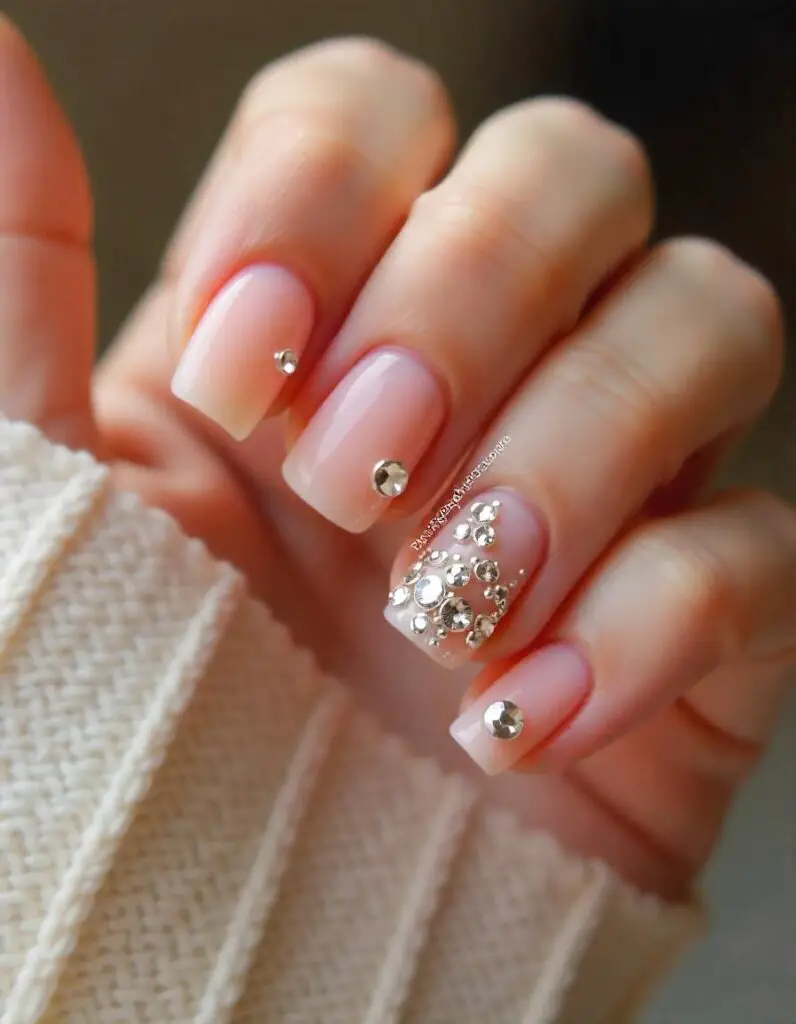

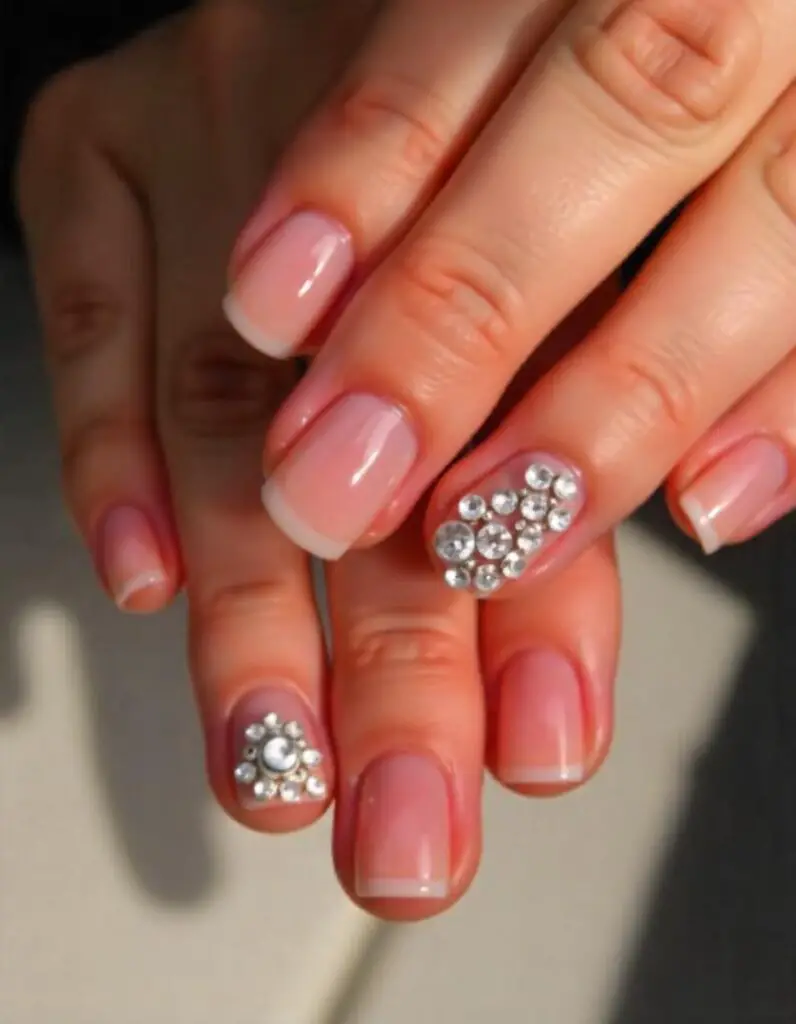

Short nails can look absolutely stunning with rhinestones! You don’t need long nails to make a statement. Adding rhinestones to short nails gives them a touch of elegance without being overwhelming. From minimal designs to clustered accents, simple rhinestone nail designs on short nails are perfect for everyday wear or special occasions.
How-To Steps:
- Start with clean, shaped short nails.
- Apply your favorite base color (neutral shades work great).
- Use nail glue to attach small rhinestones near the cuticle or as accents.
- Seal the look with a clear top coat for shine and durability.
Perfect for:
- Daily office or college looks
- Casual meet-ups
- Family gatherings
12. Rhinestone Nails Paired with Floral Designs 🌸
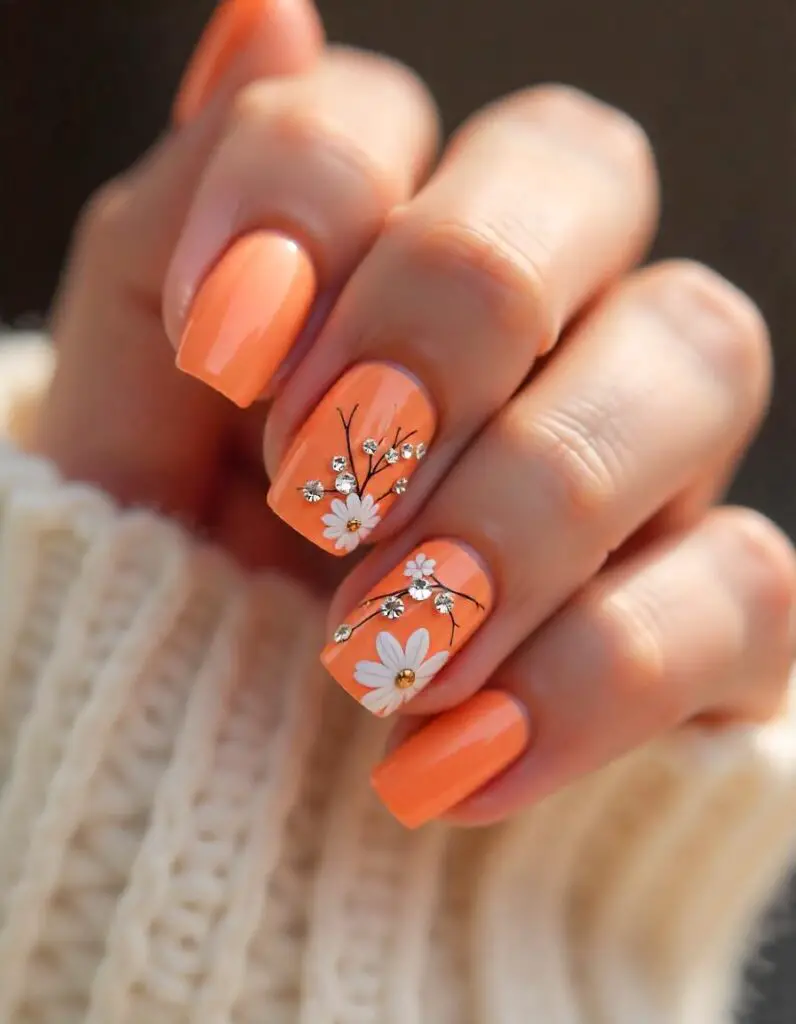

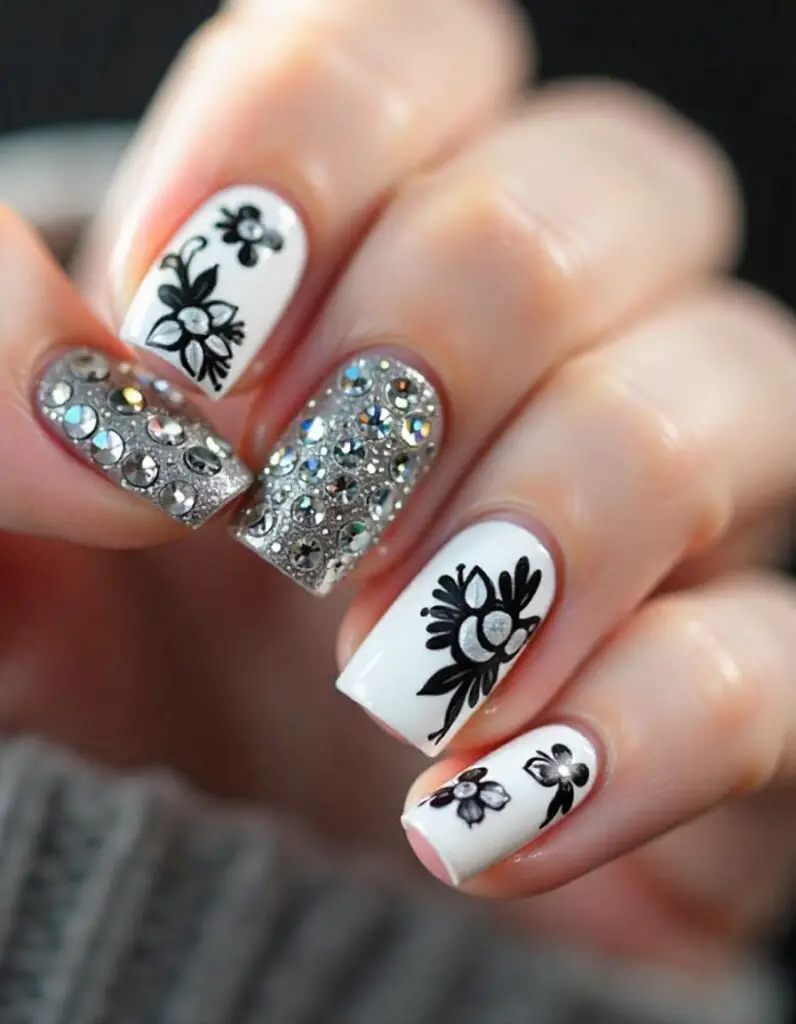

Nothing says “pretty” like a mix of rhinestones and floral art. This combo adds charm and elegance to your nails effortlessly. Whether you go for hand-painted flowers or floral decals, rhinestones give them a sparkling upgrade. These simple rhinestone nail designs with floral elements are both fresh and timeless.
How-To Steps:
- Apply a pastel or light-colored base coat.
- Add floral designs using nail stamps, stickers, or freehand art.
- Place small rhinestones at the center of the flowers or as accents.
- Finish with a glossy top coat to make everything pop.
Perfect for:
- Weddings or engagements
- Spring and summer events
- Romantic dinner dates
13. Summer Vibes with Rhinestone Nails ☀️
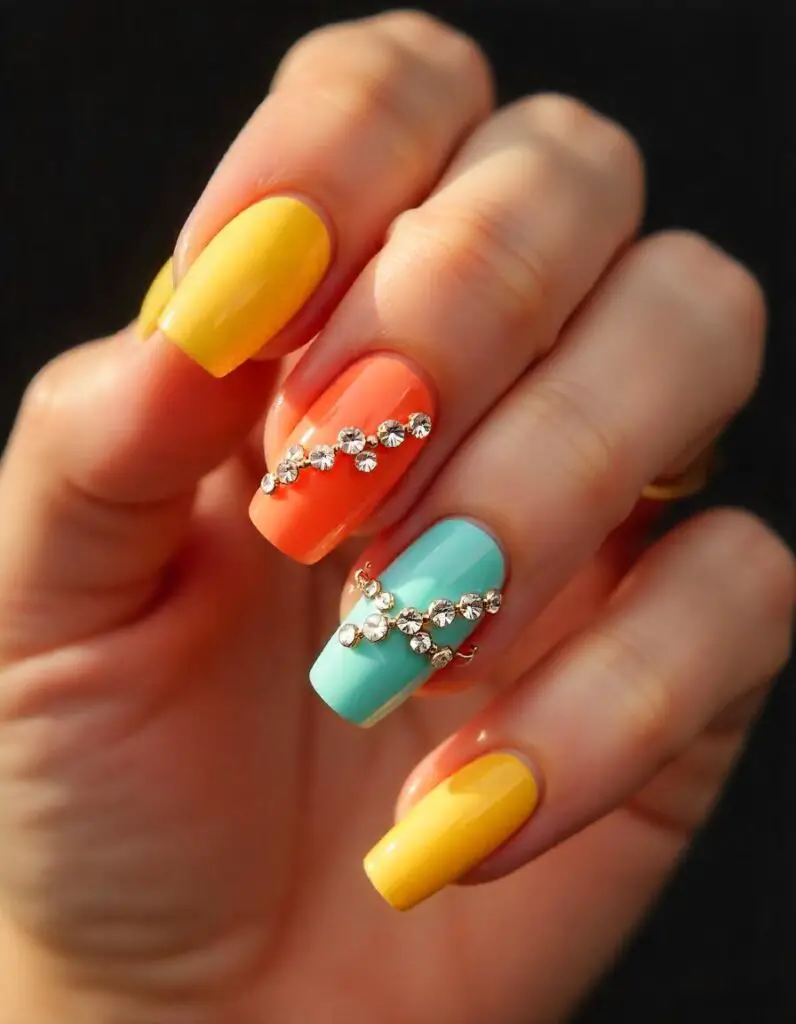

Add sparkle to your summer with vibrant nails and rhinestones! Bright colors like yellow, orange, or aqua paired with shimmering rhinestones scream fun in the sun. These simple rhinestone nail designs are ideal for beach vacations or summer parties.
How-To Steps:
- Pick a bright summer shade and apply it as your base.
- Use rhinestones to form fun patterns like sunbursts or waves.
- Keep it minimal for a chic look or go bold with multiple stones.
- Protect your design with a high-shine top coat.
Perfect for:
- Beach trips
- Pool parties
- Summer festivals
14. Almond-Shaped Nails with Rhinestone Elegance
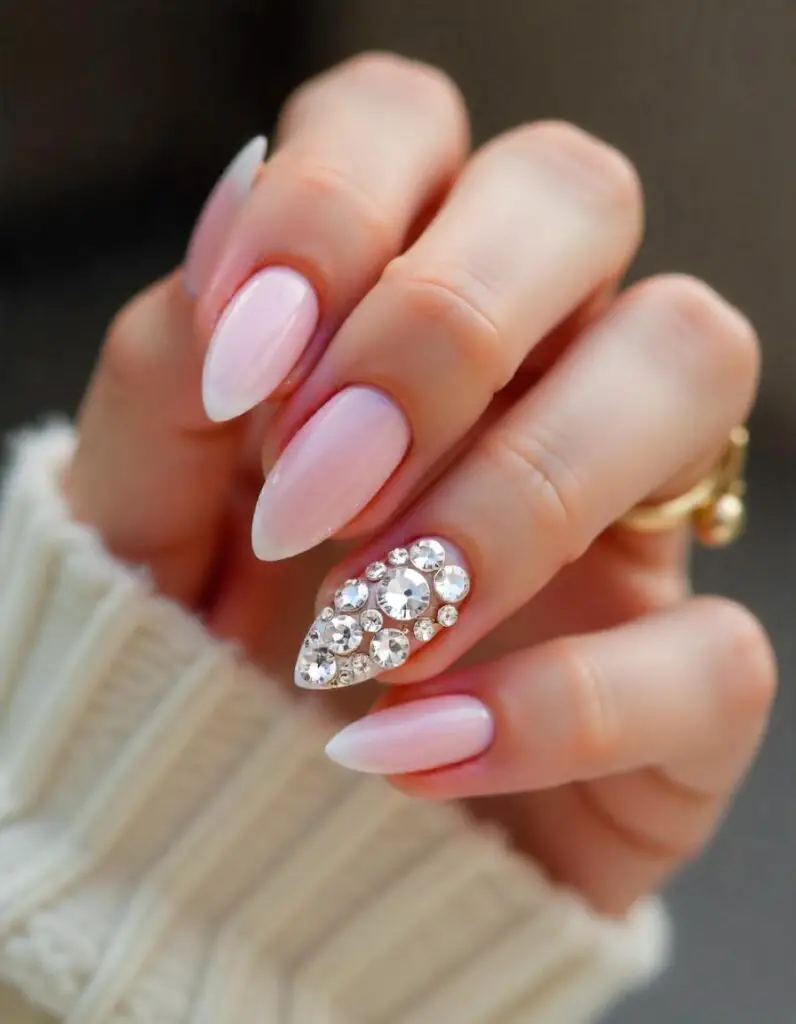

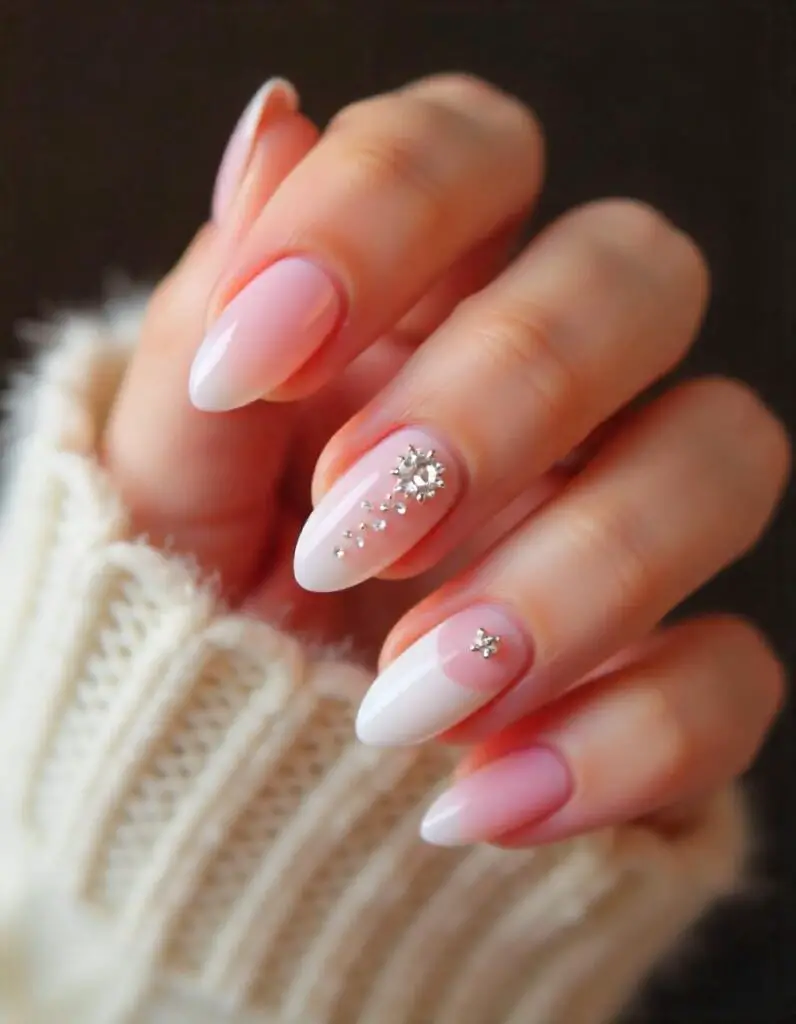

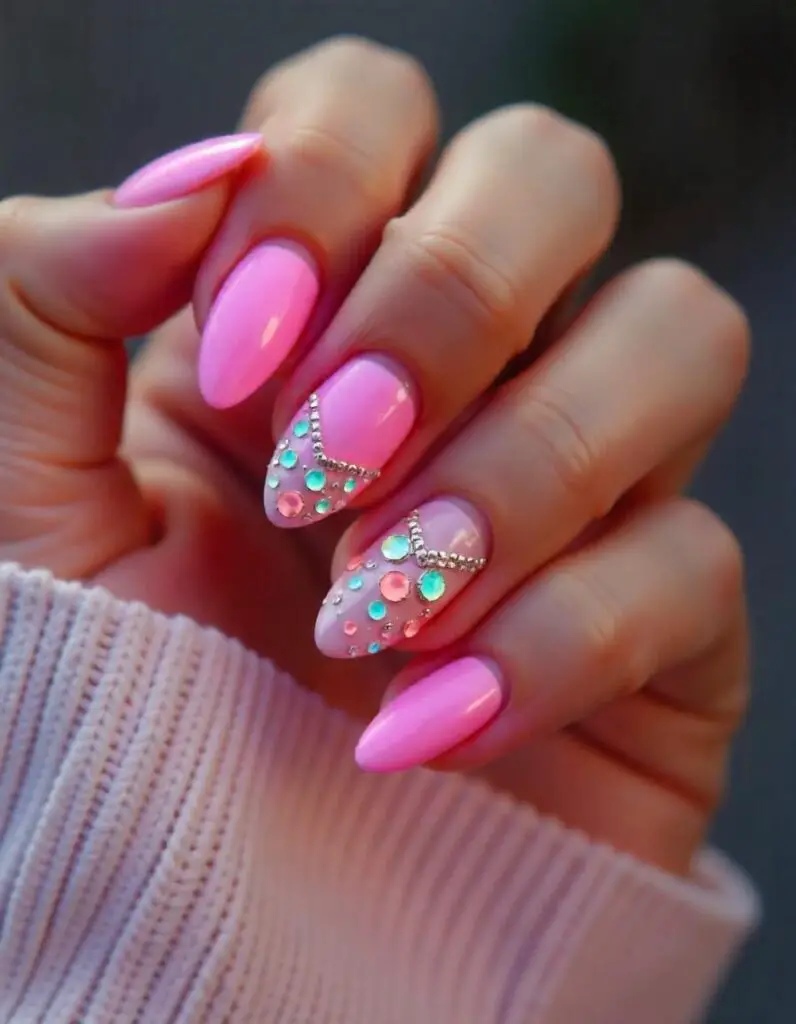

Almond nails are naturally chic, but rhinestones make them irresistible. These simple rhinestone nail designs enhance the slender and elegant shape of almond nails. Whether you prefer soft pastels or bold dark tones, rhinestones will elevate your look instantly.
How-To Steps:
- File your nails into a sleek almond shape.
- Choose a base color that matches your style.
- Add rhinestones along the tips or in a vertical line down the nail.
- Lock the design with a durable top coat.
Perfect for:
- Formal events
- Parties and celebrations
- Date nights
15. Romantic Rhinestone Nails for Valentine’s Day 💕
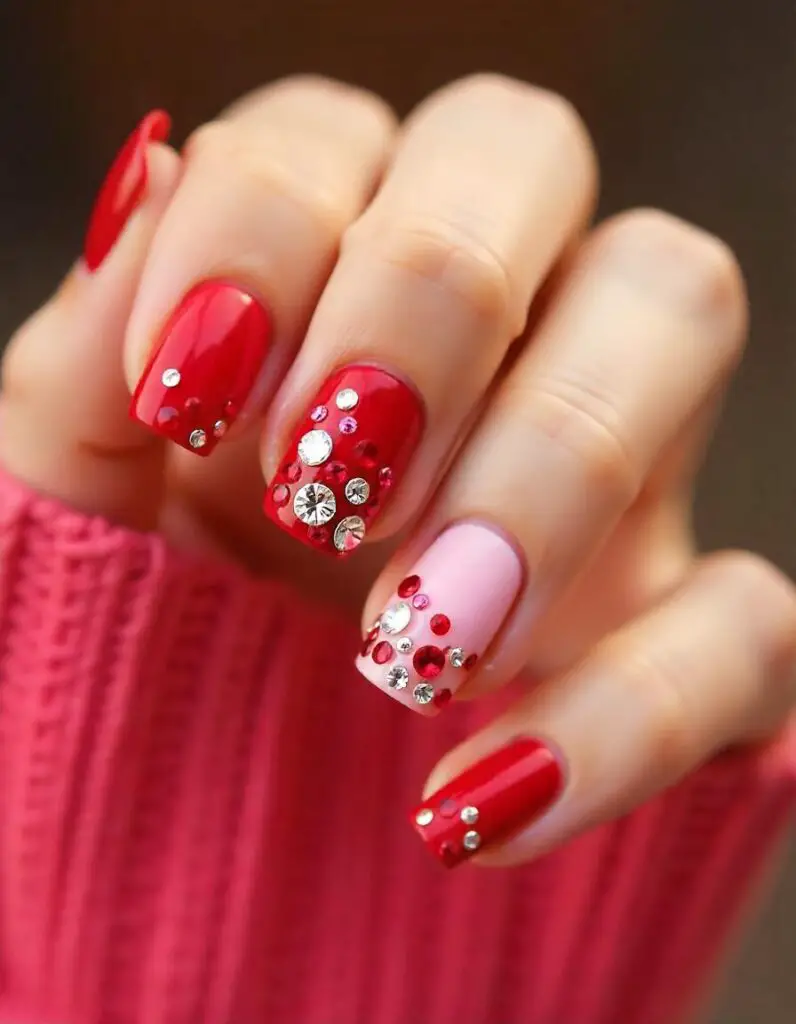

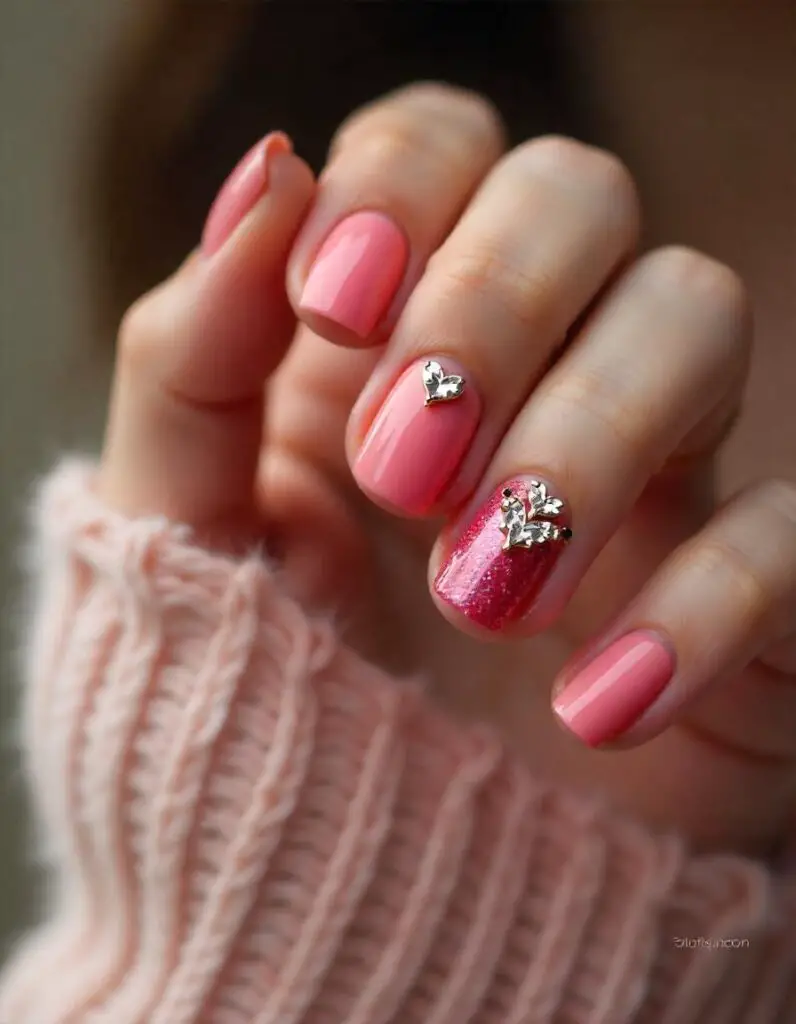

Show some love with rhinestone-studded Valentine’s nails! These simple rhinestone nail designs can feature hearts, romantic colors like red or pink, and, of course, dazzling stones. They’re perfect for celebrating love in style.
How-To Steps:
- Start with a romantic base shade like red, pink, or white.
- Use rhinestones to create heart shapes or scatter them across the nails.
- Add cute details like glitter or ombre effects for extra charm.
- Finish with a top coat to keep your nails flawless.
Perfect for:
- Valentine’s Day
- Anniversaries
- Romantic outings
16. Sparkly Glitter & Rhinestone Nail Art 💎✨
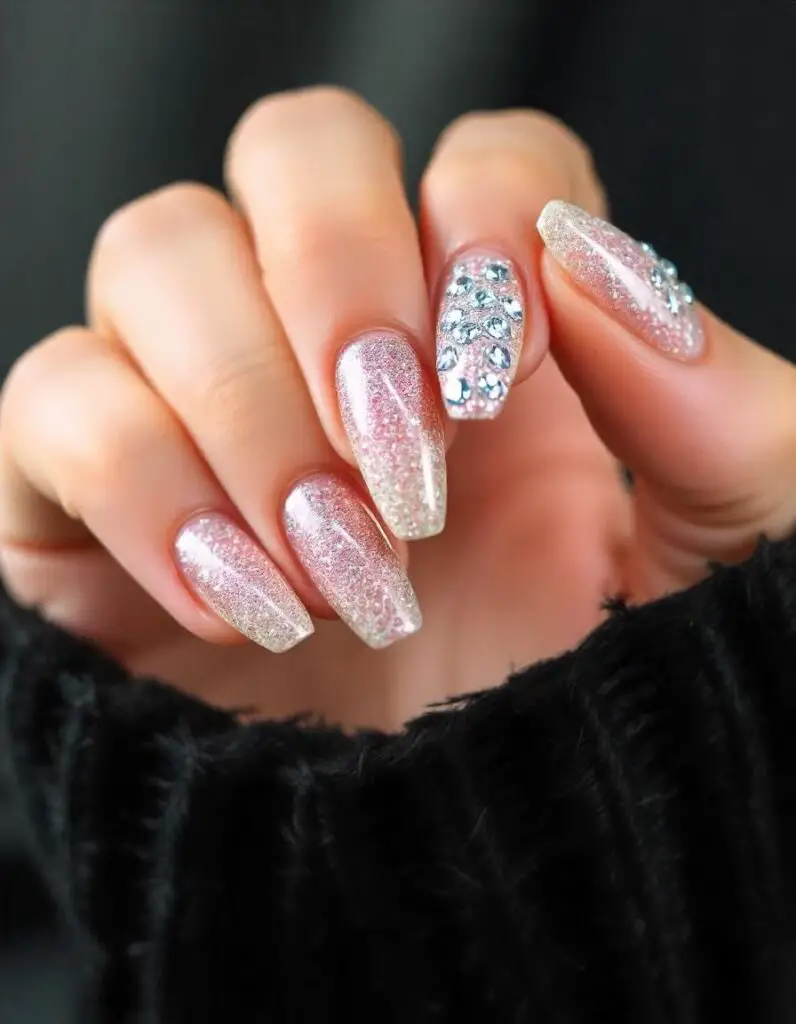

Glitter and rhinestone nails are the ultimate combo for those who love all things shiny! Adding rhinestones to glittery nails creates a glamorous look that’s perfect for parties, date nights, or just making a bold statement. The sparkle from the glitter complements the rhinestones beautifully, making your nails look like mini pieces of jewelry. The best part? You can play with colors and designs to suit your vibe!
How-To Steps:
- Apply a base coat to protect your nails.
- Paint your nails with a glitter polish of your choice.
- While the polish is wet, place rhinestones using a picker tool or tweezers.
- Arrange them along the cuticle or in patterns.
- Seal the design with a top coat to keep everything in place.
Perfect For:
- Evening parties 🎉
- New Year’s celebrations 🎆
- Girls’ night out ✨
17. Elegant Green Nails with Rhinestones 🌿💎
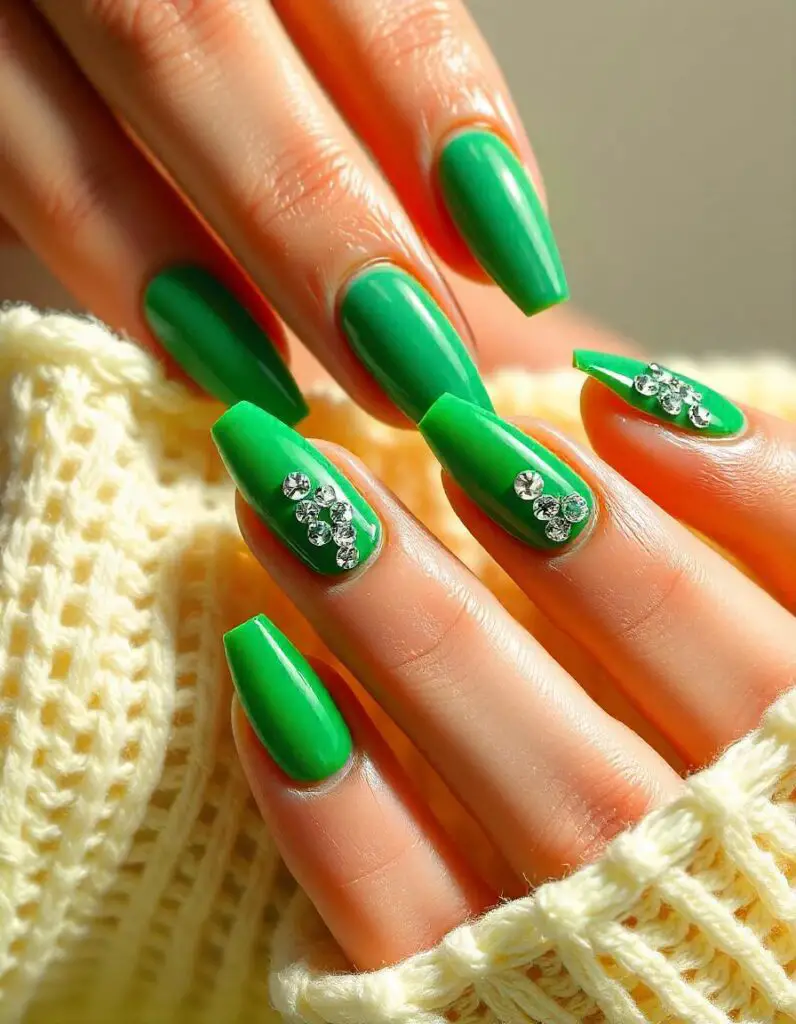

Green nails with rhinestones bring a fresh, modern twist to nail art. The color green symbolizes growth and harmony, and when paired with rhinestones, it looks effortlessly chic. Whether you choose a deep emerald shade or a soft pastel green, adding rhinestones gives your nails a unique and elegant touch.
How-To Steps
- Apply a base coat to prep your nails.
- Paint your nails with your chosen green nail polish.
- Once dry, use nail glue to attach rhinestones.
- Place them in straight lines, random clusters, or at the base for a classy look.
- Finish with a shiny top coat.
Perfect For
- Spring events 🌸
- Office parties 🖋
- Casual day-to-night looks 🌿
18. Rhinestone Nails for Weddings 👰💎
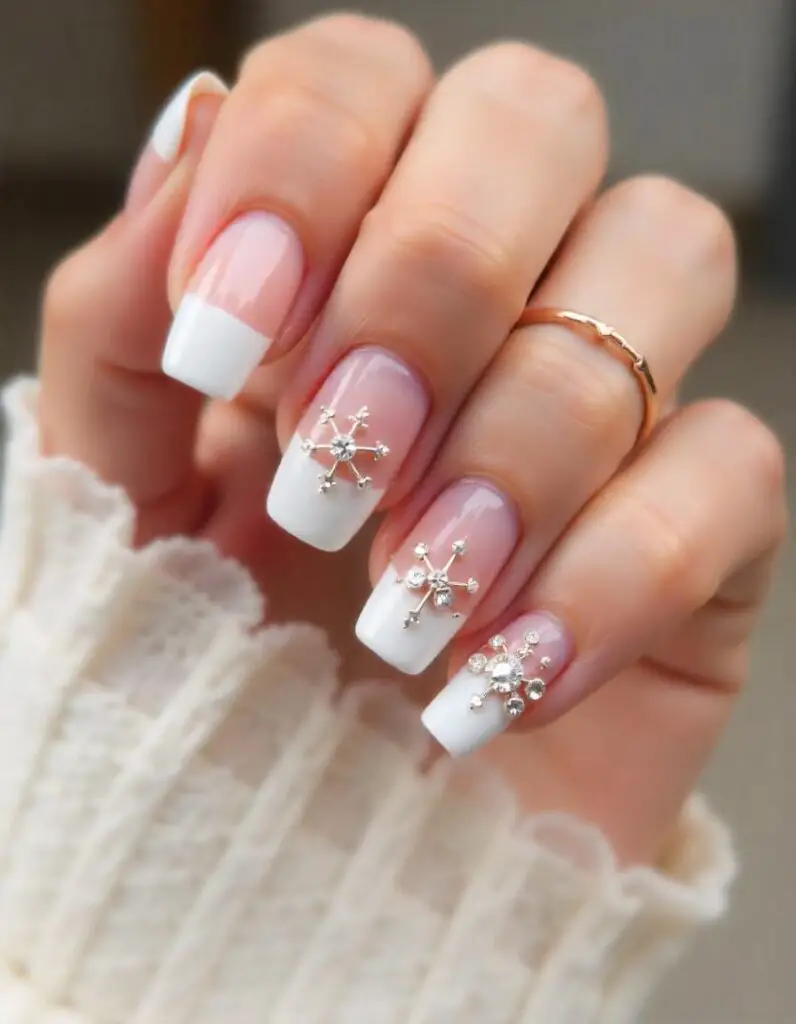

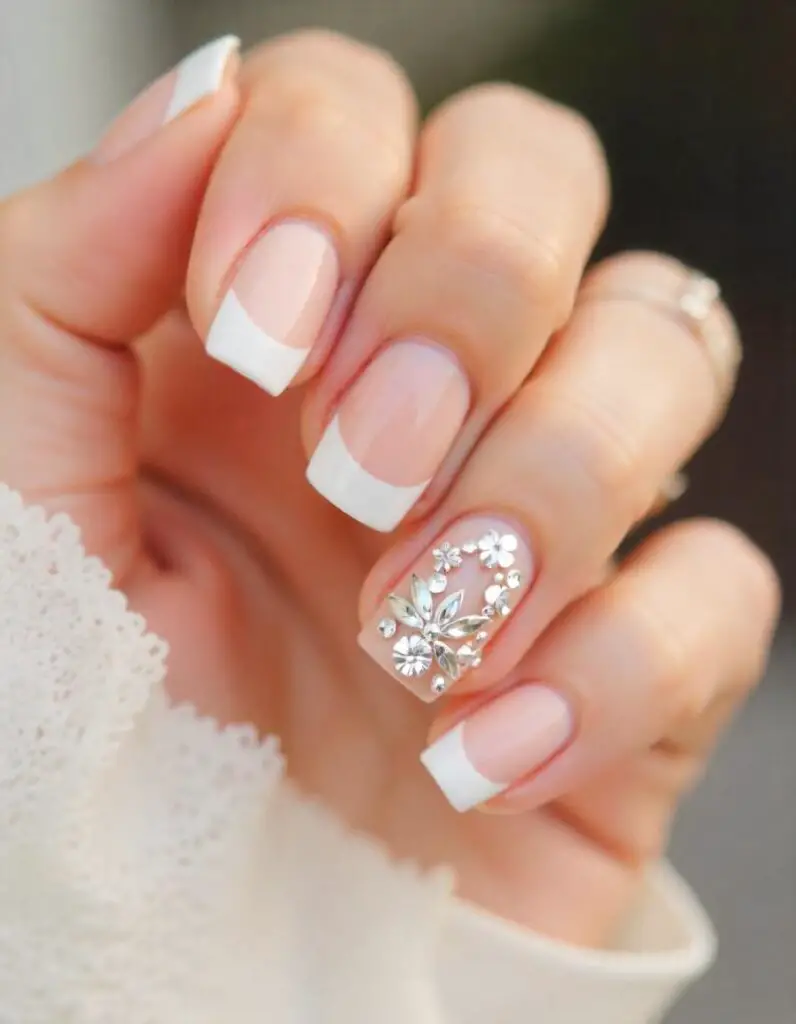

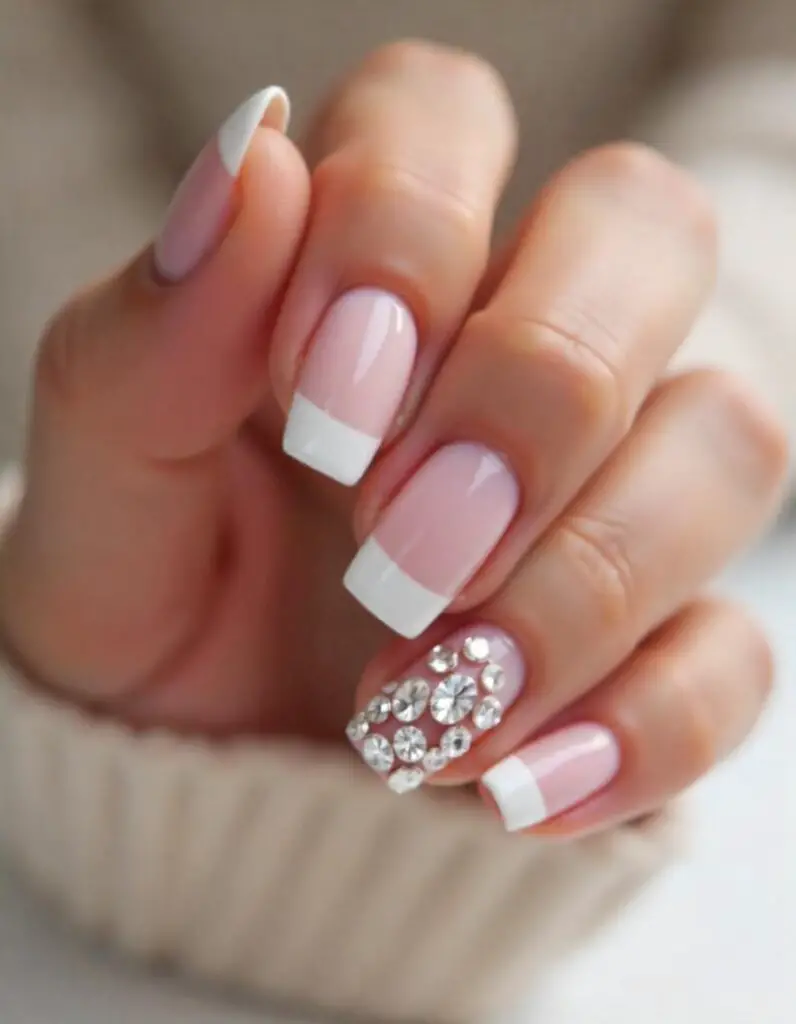

Nothing says “bridal elegance” like rhinestone wedding nails. These designs are all about soft, romantic vibes with just the right amount of sparkle. Typically paired with neutral shades like white, beige, or blush, rhinestones can highlight a French manicure or create delicate floral patterns that scream “I do!”
How-To Steps
- Start with a clean base and apply a sheer or neutral polish.
- Create a French tip or leave the nails plain.
- Add rhinestones near the cuticle or as floral accents.
- Secure them with nail glue.
- Apply a glossy top coat to make the design last longer.
Perfect For
- Weddings 👰
- Bridal showers 🎀
- Anniversary celebrations ❤️
19. Birthday Rhinestone Nail Ideas 🎂💎
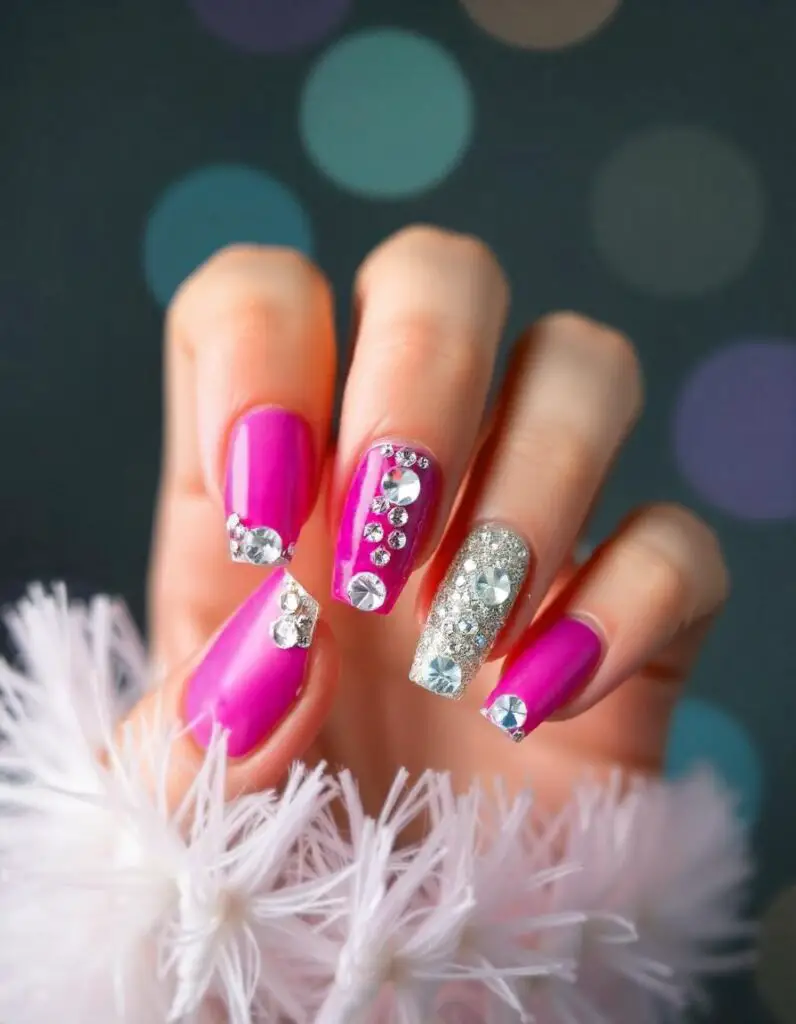

Birthday nails with rhinestones are all about celebrating in style! Think vibrant colors, glitter, and dazzling rhinestones to match the festive mood. Whether you want a bold look with bright shades or a subtle sparkle with pastel tones, rhinestone accents can make your nails birthday-ready in minutes.
How-To Steps
- Apply a base coat to ensure your nails are protected.
- Choose a vibrant or glittery nail polish as your base color.
- Use rhinestones to create a birthday theme—like confetti patterns or numbers.
- Stick them with glue and secure with a top coat.
- Add extra glitter if you’re feeling adventurous!
Perfect For
- Birthday parties 🎉
- Surprise celebrations 🎁
- Photo shoots 📸
How to Easily Add Rhinestones to Your Nails?
Applying rhinestones to your nails is easier than you might think! Follow these simple steps:
- Prep Your Nails: Start with clean and shaped nails. Apply your favorite nail polish and let it dry completely.
- Use Nail Glue or Topcoat: Place a small dot of nail glue or clear topcoat where you want the rhinestone.
- Pick Up Rhinestones: Use a toothpick, tweezers, or a rhinestone picker tool to place the stones on your nails.
- Secure Them: Gently press the rhinestones down and let them set. Apply another layer of topcoat over the stones to keep them in place.
Voilà! Your simple rhinestone nail designs are ready to dazzle.
What Nail Designs With Rhinestones Are Trending?
When it comes to rhinestones, the possibilities are endless! Here are some of the most-loved styles:
- French Tips with a Twist: Add a single rhinestone at the base or along the tip for a classy look.
- Glitter and Glam: Combine glitter polish with rhinestones for a party-ready vibe.
- Accent Nails: Highlight one or two nails with rhinestones for a chic, understated look.
- Floral Patterns: Create small flower designs using rhinestones as petals.
- Minimalist Style: Place one rhinestone on each nail for a simple yet stylish design.
These designs are perfect for anyone who loves experimenting with simple rhinestone nail designs that are both trendy and elegant.
How to Pick the Perfect Colors for Your Rhinestone Nail Designs?
Choosing the right colors can make all the difference! Here’s how to do it:
- Match Your Outfit: Pick rhinestones that complement the colors of your clothing for a cohesive look.
- Go Neutral: Clear or silver rhinestones work well with any nail color and are great for a versatile style.
- Seasonal Vibes: Opt for pastel shades in spring, bright tones in summer, and deeper hues in winter.
- Mix and Match: Don’t be afraid to experiment with colorful rhinestones for a playful and unique design.
Remember, with simple rhinestone nail designs, there are no strict rules—just go with what feels right and makes you happy! 😊
Where Should You Place Rhinestones on Your Nails? 💎
The beauty of simple rhinestone nail designs is that you can place them almost anywhere on your nails to create a stunning look. Here are some popular ideas:
- At the base of your nail: Add a rhinestone near the cuticle for a classy, minimal look.
- Along the edges: Create a sparkling border around your nails for a chic and neat design.
- In the center: A single rhinestone in the middle of your nail can look elegant and stylish.
- On one accent nail: Keep most nails simple and make one stand out with a cluster of rhinestones.
- Form a pattern: Arrange rhinestones into shapes like a heart, star, or flower for a fun twist.
The placement depends on your mood and style, so feel free to experiment until you find what feels just right. Your nails, your rules! ✨
What’s the Best Way to Pick Up Rhinestones?
Picking up rhinestones for your simple rhinestone nail designs is easier than you think! You don’t need fancy tools—just a few tricks and the right tools:
- Use a wax pencil or rhinestone picker tool: These tools are designed to grab small rhinestones without any hassle.
- Try a dotting tool or toothpick: Apply a tiny bit of clear nail polish or glue to the tip, and it’ll help pick up the rhinestone.
- Tweezers for precision: If you’re going for a detailed design, tweezers can help place each rhinestone exactly where you want it.
- DIY hack: Roll a bit of tape around the end of a pencil or stick for a quick fix to pick up rhinestones.
Once you’ve picked up the rhinestone, gently press it onto your nail and secure it with a top coat or nail glue. And voilà—your nails are sparkling in no time! 🌟
Conclusion: simple rhinestone nail designs!
Simple rhinestone nail designs are a game-changer for anyone who loves stylish yet effortless nails. Whether you prefer a minimalist vibe or a bold statement, these sparkling accents can elevate your look instantly. So, grab your rhinestones and start creating your next favorite design.
Remember, your nails are like tiny canvases—let them shine as bright as you do! 🌟 Which rhinestone design are you excited to try first? Share your thoughts and let’s sparkle together!


